| FLICKER Brainstorming |
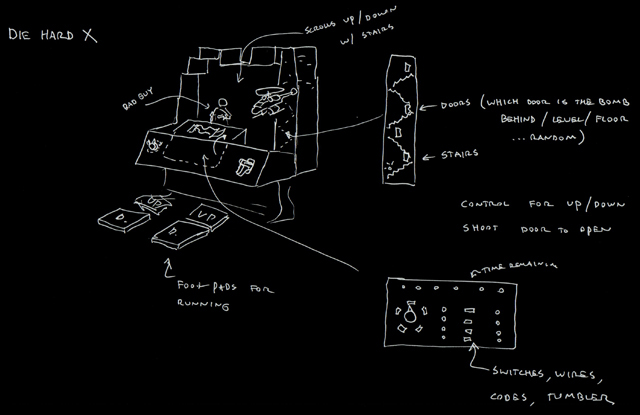
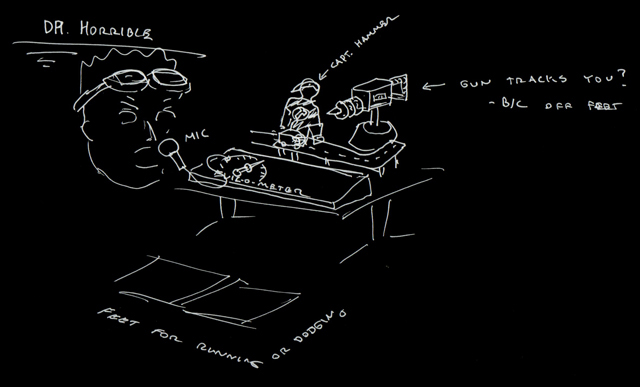
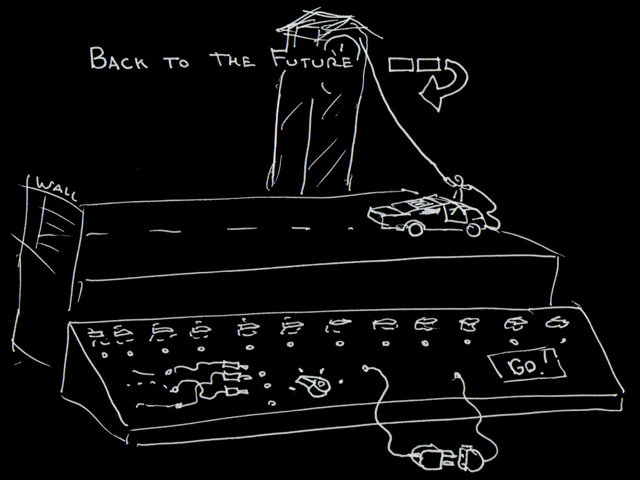
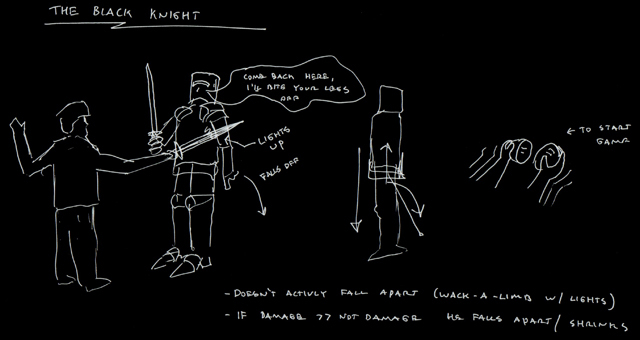
| We began the process by brainstorming various themes inspired by popular culture. We wanted to design a game that would be active and engaging for the player as well as meet all the requirements of the project. |
| Die Hard |
 |
| Dr. Horrible's Sing Along Blog |
 |
| Back to the Future |
 |
| Monty Python's Black Knight |
 |
| Free Ski |
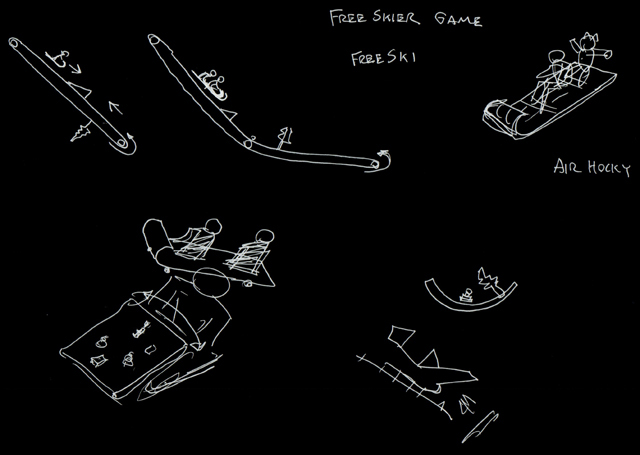 |
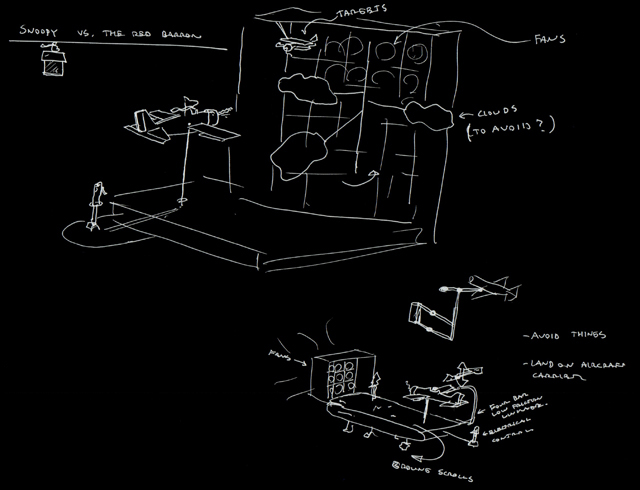
| Snoopy vs. the Red Barron |
 |
| |
| Our FLICKER Concept: The Italian Job |
| We decided to use The Italian Job as our final inspiration for our FLICKER. We found the concept engaging, fun, cohesive, and family friendly. |
 |
 |
| |
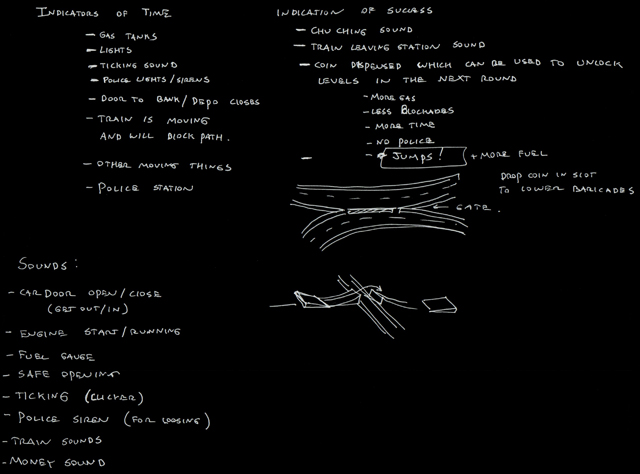
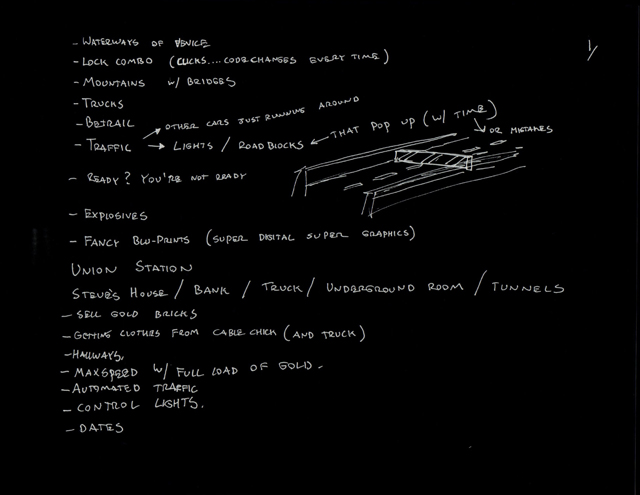
| The Driving Scene |
| Brainstorming and Ideas: |
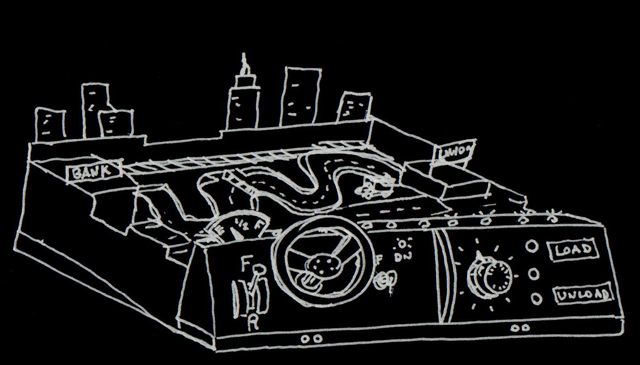
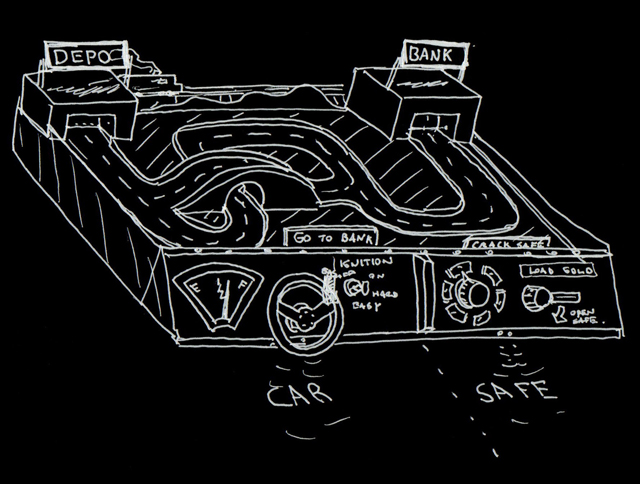
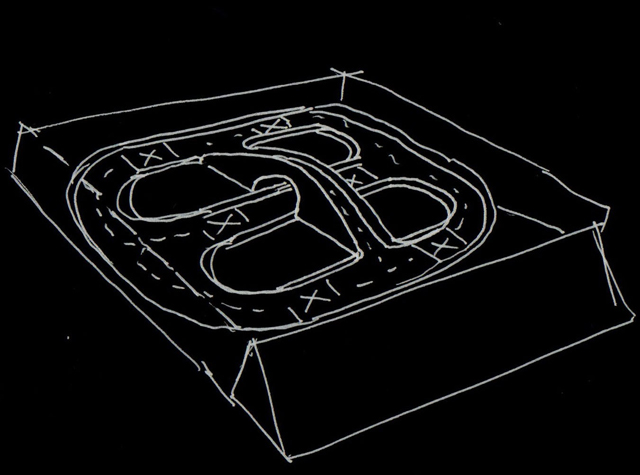
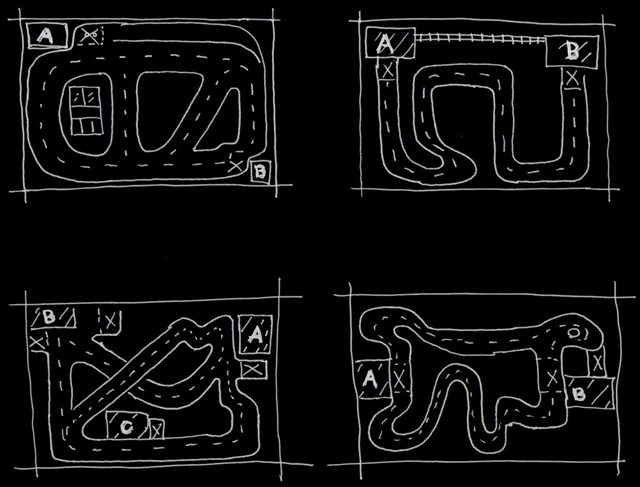 Driving course layout options Driving course layout options
|
Alternate driving course layout option |
|
|
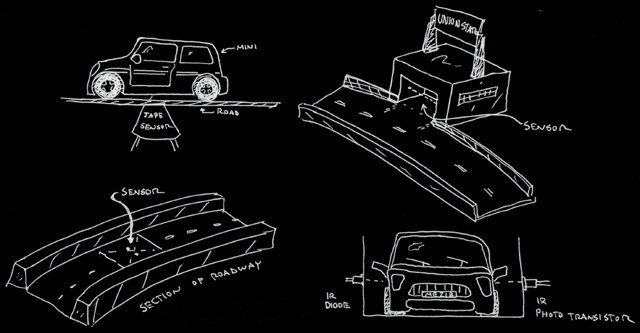
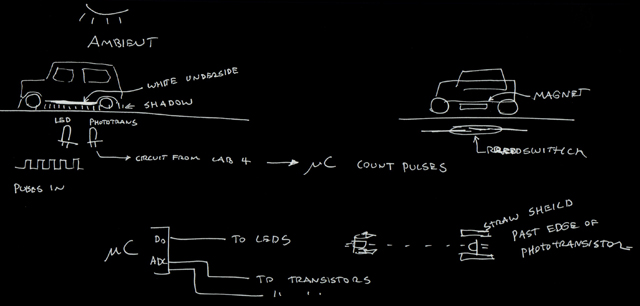
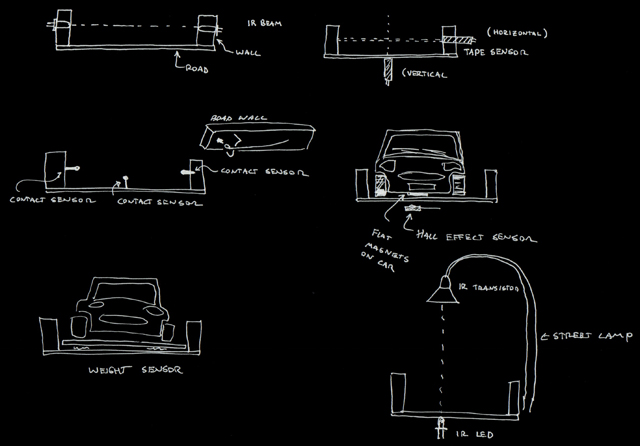 Car sensing Car sensing
|
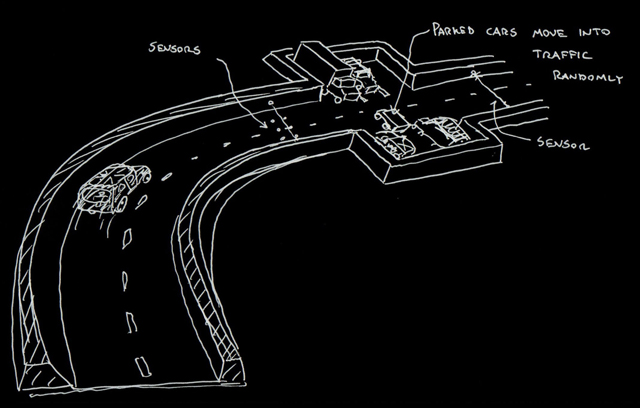 Obstacles: traffic Obstacles: traffic
|
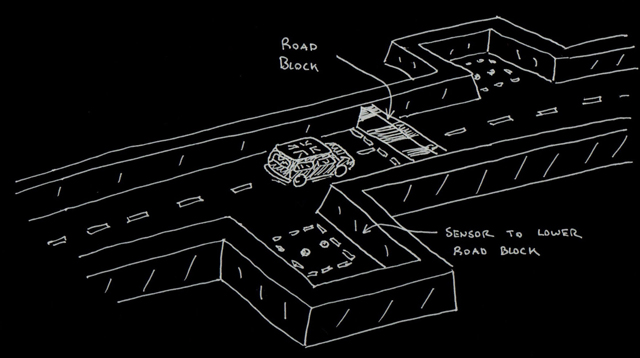 Obstacles: barriers Obstacles: barriers
|

|
 Road elements Road elements |
 Flippable signs Flippable signs
|
 Project requirements Project requirements |
|
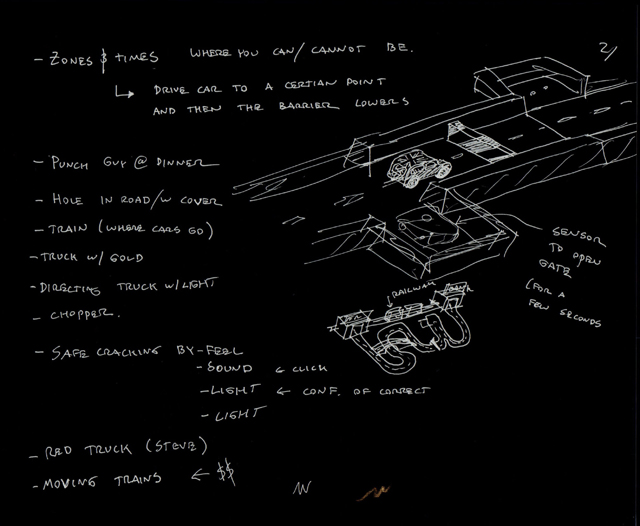 |
 Other ideas Other ideas |
| |
| Functionality: |
| Our primary objective with the driving was to create a fun, challenging, and engaging experience that those of all ages could enjoy and lasted at least 20 seconds. We wanted the driving parts to be as intuitive as possible, so we chose to use a steering wheel to direct the remote controlled Mini Cooper around the track. Another goal that evolved as we progressed with the project was to eliminate any external resetting of the game. We wanted the board to take care of resetting the game on its own so that one driver could pick up where the other left off and still have a great experience and for it to be challenging enough to extend the game to the minimum 20 seconds. |
| |
| Simplification and Development: |
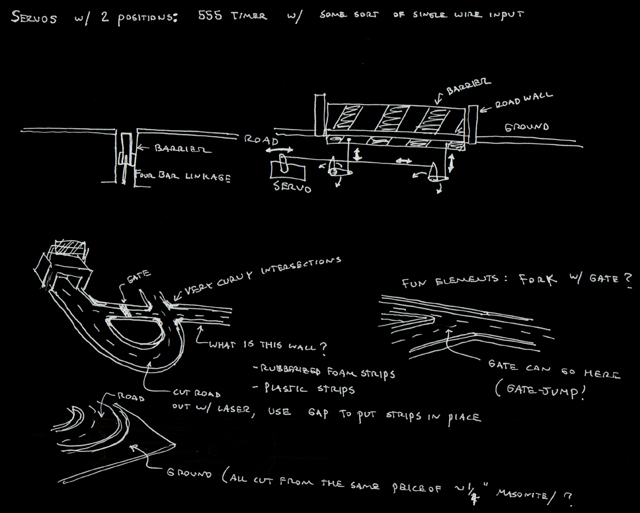
| Our initial concepts for the board were far more excessive than what we ended up creating. Initially, we wanted rising and falling blockades, cars that pulled out of driveways when a sensor was triggered, and a rotating disk with obstacles that had to be avoided on it. And these were our ideas after an initial simplification! |
| Soon after building our board and driving our Mini around, it became very clear that driving on our board was difficult enough as it was. Some of us even found it difficult to complete the driving activity in the allotted 45 seconds for the game! Much of this difficulty came from how we decided to design the board track (without additional obstacles). |
| |
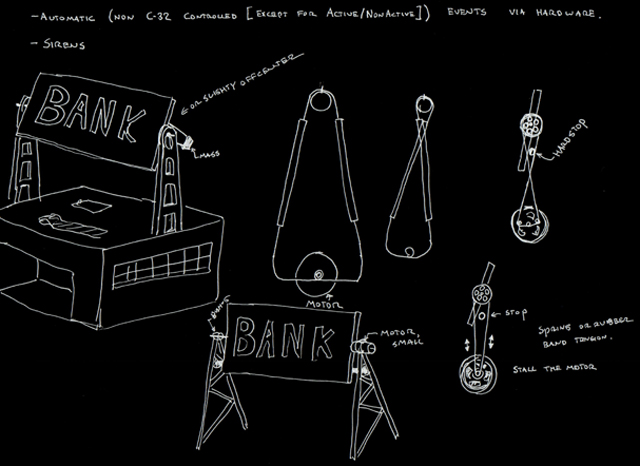
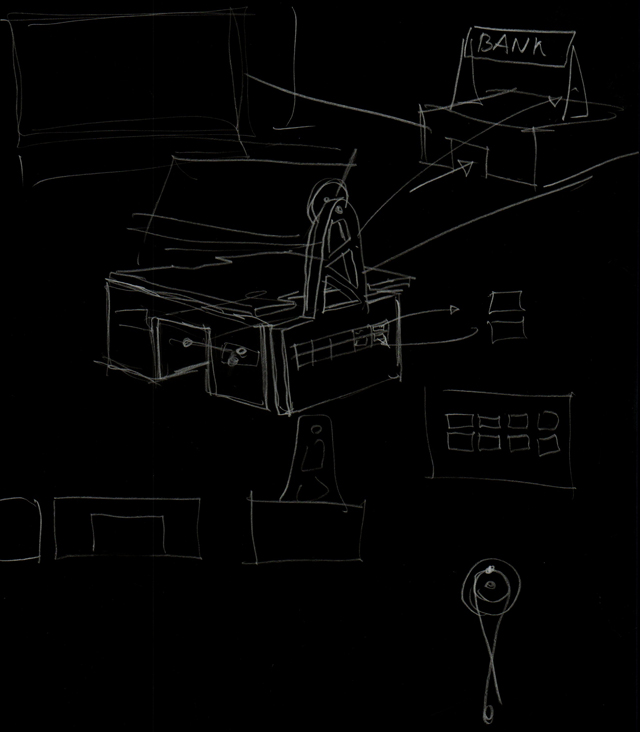
| The Safe |
| Brainstorming and Ideas: |
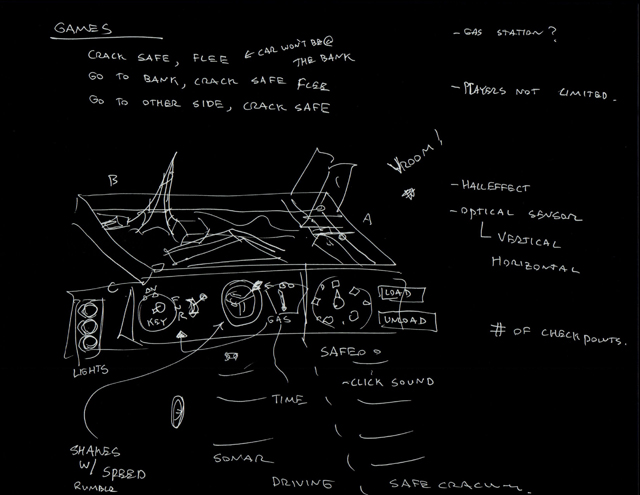
Close up of initial safe concept |
| |
| Functionality: |
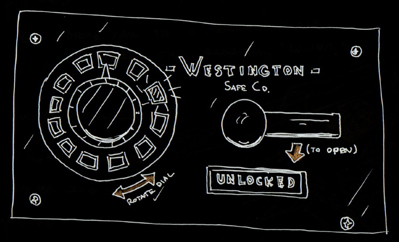
In both Peter Collinson’s and F. Gary Gray’s renditions of The Italian Job, the image of safe-cracking is particularly prevalent, and with this in mind, TeamMini chose to incorporate lock manipulation into its Flicker. We would build a game that required the player to crack a safe, the old-school way. |
| From the onset, we placed a high degree of importance on realism. Not only did the safe need to look like a safe, but it also had to feel like a safe. Both the numeral dial and the lock lever should convey a sense of strength and precision, and these were characteristics that dictated the design of the safe module. |
| |
| Simplification and Development: |
A Simplified Design: |
The initial design for the safe module included several noteworthy features. |
- A series of LEDs would signal to the user which way to turn the safe dial, how many stages have been cleared, and whether or not the safe is locked.
- By nature of the analog output of a potentiometer, mounting the safe dial on a continuous-rotation pot (CRP) would provide the microcontroller with constant access to the position of the dial, as well as its current direction of rotation, i.e. clockwise or counter-clockwise.
- The microcontroller would randomly generate a new target position for safe dial and keep track of the position of the safe dial. If, while turning the safe dial, the user passed the target value, this would count as an overshoot and the safe dial would need to be reset by the player; otherwise, reaching the target would signify that the player had cleared a stage.
|
| The first sketches of the safe did not incorporate a fully-functioning door, as this was a complication that we were not ready to tackle at the time. |
No Bolt-On Solution: |
| As we dove further into the design of the safe module, we began to reconsider some of our initial design solutions. Most significantly, we knew that we required some method of counting dial ticks or accessing dial position, but research into CRPs quickly persuaded us to find a different dial input. It was suggested that we consider rotary encoders (RE), but these offered many of the same drawbacks as CRPs: |
- Both REs and CRPs have weak input shafts not capable of supporting the potential forces an enthusiastic player would place on a safe dial. Therefore, the safe dial would need to be supported on its own, much stronger shaft, regardless of the solution we chose.
- REs and CRPs do not provide both smooth operation and user feedback. For example, we desired a mechanical ticking sound as the safe dial was turned, so an additional subassembly to provide such feedback was necessary if either solution was to be used.
- Both REs and CRPs are expensive and would take several days to obtain; this was time and money we did not have.
|
Human Conditioning and Safe Cracking: |
At this point, it became necessary to think outside of the box. The encoder and potentiometer would allow access to dial spin direction, but this was the only advantage either held over a simple switch. We therefore asked ourselves if it is necessary to know dial direction. Brief research showed this was not the case for one very interesting but altogether simple reason: Human Conditioning. Most of us have used rotary dial locks at one point in our lives, and we have all been conditioned to turn a lock dial clockwise, then counter- clockwise, then clockwise again. 95% of users would spin the dial in the proper direction regardless of whether or not the game specified to do so; we would go on to take advantage of this fact by using a simple switch to count dial ticks (interval movements of the dial) rather than dial position. |
The Next Level: |
TeamMini came to adopt an “all or nothing” approach to each aspect of this project, including the safe. Although we were aware of the mechanical issues that would arise from making a full-functioning safe, we decided that the Flicker would be deficient without it, and so we set to work designing a robust safe door, complete with locking mechanism. |
Details: |
Prototyping the indicator lights with LEDs led us to look for a different light source. We desired a soft glow and gentle flashing that is hard to achieve with LEDs; therefore, we chose to use incandescent lamps for our indicators, as their characteristics matched our vision for the safe indicators. |
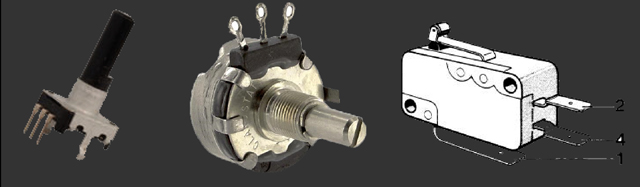 From left to right: Encoder, Potentiometer, Limit Switch From left to right: Encoder, Potentiometer, Limit Switch
|